 Exercise 3 - Create an assembly
Updated : 26 November 2024
In this exercise, you will learn how to create an assembly holding several occurences of a part document.
Note
After downloading the Automation_SelfLearning solution from GitHub, you will find the whole example code for this exercise in the Exercise_3 project.
- Set up your environment.
- Launch Visual Studio
- Open the project Automation_SelfLearning project to begin coding your own application. This project should contain your work from first two exercises. If not, you can get code directly from Exercise_2 project.
Design the Application Interface
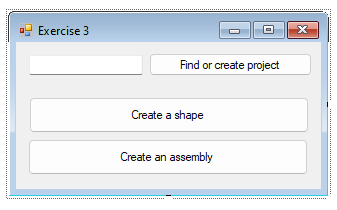
- Open the design form of your application. This interface already contains a TextBox and two Buttons.
Add a Button to the form as shown below:

- Add a Button Click Event
- Double-click the button on the form to generate a click event handler.
- Implement the click event method to create an assembly into an assembly document.
Important
To achieve this exercise, you will need more information about Documents and about Elements
Coding Steps
- Ensure the following functionalities are included in your method:
- Find or create target project (cf. Exercise 1)
- Create a shape (cf. Exercise 2)
Into the same project, create an assembly document.

Note
You will need to know document file extension to achieve this task. To retrieve the extension associated with a TopSolid document, you must first create the document in TopSolid, then select it in the project tree. Next, use the "Document Type..." command from the "Tools" menu in the context menu.

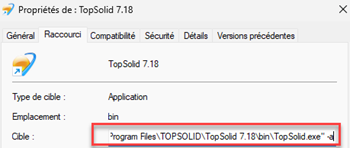
Note that TopSolid must be launched with the -a command line option, as this feature is only available in advanced mode.

Find previously created part document using methods from
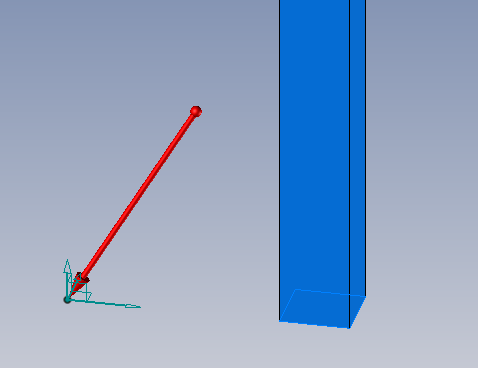
IPdminterface, then open it.Into this document, create a frame like below,then, publish this frame.


Tip
For this part of the exercise, you need to use
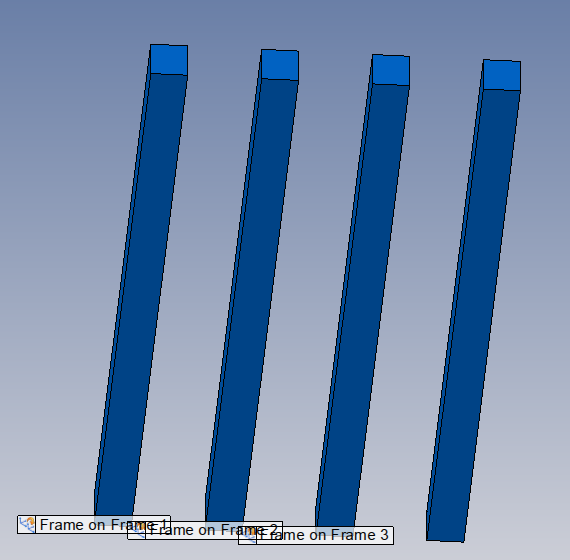
IGeometries3DinterfaceNow, into the assembly document, include 4 times the part document to create 4 inclusions. Each inclusion has to be positioned with a "Frame On Frame" constraint, using XY offsets.

Tip
You will have to create a Positioning and add Constraints to be able to include the occurences at the right place.
Important
This is the tricky part of the exercise.
Here, you have to find the image of the frame published in the current assembly document.
To achieve that, you will have to use methods from IAssemblies interface.
Especially, method GetOccurrencePublishing will be very useful.
To make an inclusion, you will have to use method CreateInclusion.
Test your application:
- From the Debug menu, select Start Debugging to run your project.
- Click the button on your form to execute the functionality
Self-Learning exercises table of content:
- Exercise 1 - Get or create a TopSolid Project
- Exercise 2 - Create a shape
- Exercise 4 - Export / Import a document using STL format