Thickened
|
|
Thickened |
This command allows to thicken an open profile, with a centered, a one side or both sides mode. Extremities joints can also be managed.
Creation stages / Use:
Click the icon or select the 2D sketch > Other modifications > Thickened... command from the drop-down menu. In a Draft document, select the Sketch > Other modifications > Thickened... command from the drop-down menu.
Select the profile to thicken.
The selected profile will be converted to a construction profile, by checking the Construction option.
Select the type of offset.
|
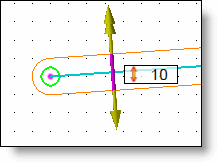
|
The thickness is distributed on both sides of the reference profile.
|
|
|
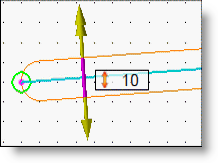
The thickness is on one side of the reference profile.
|
|
|
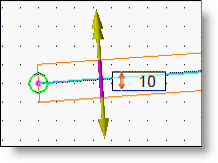
The thickness is on both sides of the reference profile.
|
Select the extremity joint:
External arcs:
|
The center of extremity arcs is coincident with the extremity of the reference profile. |
|
Internal arcs:
|
The arc is coincident with the extremity of the reference profile. |
|
Lines:
|
Lines are perpendicular to the reference profile and coincident with the extremity of the reference profile. |
|
Validate by clicking  .
.
|
|
If the profile is closed, use the Parallel command. |
|
|
|
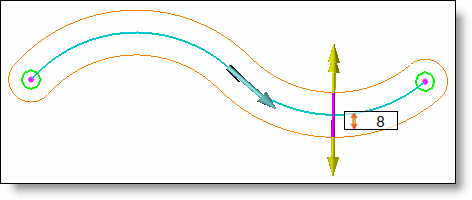
Example of creation of a thickened profile. (In blue: reference profile, in orange : the thickened profile with centered mode). |
Modifications / Additional information:
The result of this thickened profile is a contour. It is not possible to modify this result after validation. You have to edit the sketch and delete entities. If the thickened profile has to be associative and so modifiable by editing, you have to use the Thickened command.