
Tool lifetime management
|
Tool lifetime management |
The goal is to automatically change the tool or insert after a machining time, a length or an arbitrary number of cuts.
 |
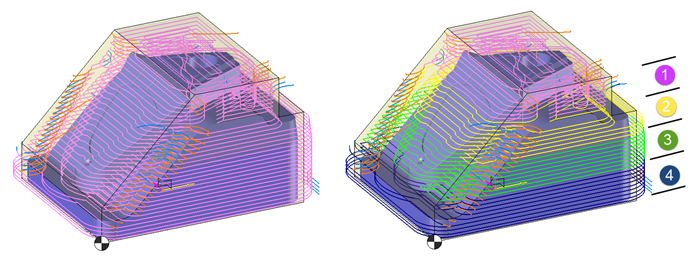
The cutting of the tool path can be done on all the operations using the tool on which the life management function has been requested. |
 |
The cutting of the tool path can only be done on certain operations using the tool on which the tool life management function has been requested.
In this case just select them from the list. |
Tool Change
Manage the tool lifetime allows to automatically change the tool when it is worn out by mounting a clone tool (a brother tool) to continue machining.
This management cut all the operations using this tool in as many copies as necessary.
There will be as many brother tools in the tool manager as cuts created in machining operations.
By default the brother tools are mounted starting from the end of the tool magazine.
The tool automatically return to the tool change point to continue the machining with a brother tool. To modify the movement to return to the tool change point it will be enough to edit the link movements.
 |
Insert change: 
Allows to change the insert during the turning operations when it is worn.
Here there is no tool change but the machining is stopped, the tool is moved to the insert change point (which by default is the tool change point of the machine).
It is possible to give another point in the machine by defining an inter-operation link during an insert change.
 The "create child operations" checkbox is only accessible in insert change mode.
When this option is unchecked child operations are not created and instead TopSolid automatically adds a marker on the tool path to indicate the cut.
Link movements between each cut are not editable but respect the rule required for the type of inter-operation movement.
When this option is checked child operations are created. It is therefore possible to define inter-operation movements between each cut (F4).
 Create child operations
| Program 1 Part 1 Tool N°1 Roughing operation Machining stage |
 Create child operations
Program 1 Part 1 Tool N°1 Roughing operation cutting 1-1 Roughing operation cutting 1-2 Roughing operation cutting 1-3 Roughing operation cutting 1-4 Roughing operation cutting 1-5
Machining stage |
 |
- The command to edit the tool lifetime management is available in a tool contextual menu in the operation manager. - This feature is not supported with the asynchronous mode
- Only 3D operations and some 2D operations (end milling, side milling, drilling, chamfering, engraving, mouse facing) can use tool lifetime management. For example it will not be possible to "cut" an operation such as grooving or breaking edges.
- If a tool is used by an operation that does not manage tool wear the Tool life management option is no longer accessible for this tool (for all operations of the machining range).
- Only operations with turning tools can use the insert lifetime management. |
 The analysis allowing to know the number of tools required depends on 3 criteria:
|
The machining length.
The operation cut is done according to the distance in machining feed rate.
|
|
The machining time.
The operation cut is done according to the time in machining feed rate.
|
|
The number of cuts.
The operation cut is done arbitrarily according to a fix number of cuts.
|
|
Number of passes
The cutting of the operation is done in an arbitrary way according to a given number of passes.
In the case of a return to the tool change position there will be no brother tool mounted.
|
To cancel the tool lifetime management for a tool just select this tool in the operations manager, choose tool lifetime management in the contextual menu and then uncheck the option:
"Manage tool lifetime". In this case the operation will be done with one tool regardless of the machning length or time and the brother tools mounted in the tool manager wili not be deleted.
 The cuts tab allows to choose the tool change position on the tool path.
|
Previous rapid movement: The cut is done on the previous Z movement in rapid.
|
|
At the exact place (Only in the case of a tool change) The Z movement for the tool change is done on the machining tool path but on the next element that composes it, Next G0, G1, G2 or G3. This option is not available in turning. When this method is active the parameters allowing to specify the lead in/lead out and links movements are available.
|
|
Next rapid movement Machining is continued until the next Z rapid movement to cut the tool path.
|
Be careful if the option "previous or next rapid movement" is used to cut the tool path the cut location depends on the number of clearance movements on the tool path. In an extreme case where there are no Z rapid movements the tool lifetime management would be useless...
When the tool change is done at the exact location where the maximum tool lifetime is reached it is possible to define the lead in/lead out and links movements.
|
Link It is possible to define the clearance altitude before to begin the tool change movement. |
|
Lead In It is possible to choose the lead in type when the brother tool will resume the tool path machining. |
|
Lead Out It is possible to choose the lead out type when the tool will leave the tool path machining. |
|
Feed rate It is possible to define the feed rate during lead in and lead out. |
With the management of the insert wear it is possible to define the inter-operation movement.
There are three possibilities:
 |
Machine This option is activated by default if there is in the machine an inter-operation link for the insert change. This movement is defined in the tool holder of the machine.
|
 |
Automatic This option allows to define one of the tool change points as point to change the insert. The movement to go to this point is automatically calculated by TopSolid.
|
 |
Manual This option allows to choose a link movement to reach the insert change point among the inter-operation movements defined for the machine.
|
|
|


