Automatic part positioning rules
Presentation :
This document is used to select positioning rules, such as the face to be machined or part orientation.
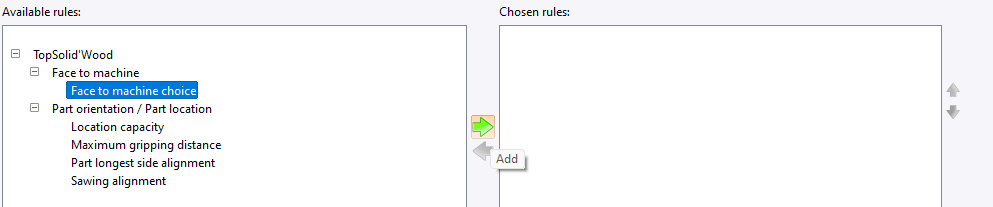
1 - Available rules (left)
List of rules.
Each rule can be selected and applied as required.
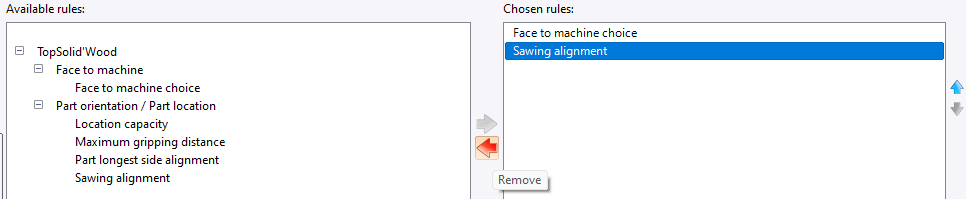
2 - Selected rules (center)
Displays rules currently applied.
Allows you to remove a rule if necessary.
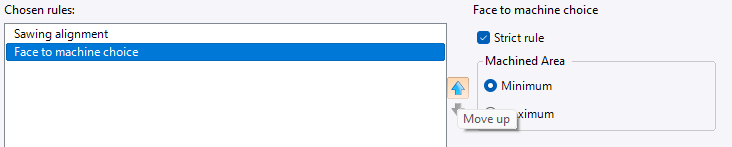
3 - 3 - Selected rule configuration (right)
Allows you to adjust parameters specific to the selected rule.
Creation stages / Use:
1. Add a positioning rule
Select a rule from the list of available rules.
Click on the → arrow to add it to the selected rules.
Once added, the rule appears in the central list.
2. Modify rule parameters
Click on a rule in the list of selected rules.
The associated parameters are displayed in the right-hand panel.
Modify options via drop-down menus or input fields.
3. Delete a rule
Select a rule from the list of selected rules.
Click on the ← arrow to remove it.
4. Change the order of applied rules
The order of rules in the list of selected rules determines the sequence in which processing of the various rules. The ↑ and ↓ arrows can be used to rearrange this order to ensure logical execution.
Available rules :
Below is the list of rules available for the different operation categories.
| Rule | Description |
Maximum gripping distance |
Choose the positioning which satisfies the maximum gripping distance. The positioning is chosen if the distance to push or pull the part is less than the maximal gripping distance. |
Sawing alignment |
Choose the positioning which alignes the sawings of the part and the sawing unit of the machine. |
Part longest side alignment |
Choose the positioning which alignes the part longest side and the X or Y axis of the machine. |
Location capacity |
Choose the positioning which satisfies the location capacity. |
Face to machine choice |
Choose the positioning which satisfies the face to machine caracteristics. If repositioning of the part is not necessary, the face is automatically chosen. |