Create a new project in Microsoft Visual Studio
Updated : 07 November 2024
This section will drive you through the creation process of a .NET project in Microsoft Visual Studio that uses the TopSolid Automation API.
Install Microsoft Visual Studio
Microsoft Visual Studio development environment have to be installed before you start. You can purchase a license or a get a free Microsoft Visual Studio Community license.
When installing, select following workload to be installed:
- NET desktop development
Launch Microsoft Visual Studio
- Launch Microsoft Visual Studio.
- When launching Microsoft Visual Studio for the first time, you may be asked to select Developer Settings. Select Visual C#
- Now you can create your first Microsoft Visual Studio coding project. You can create an empty Windows Forms application, or use a template.
Create your first project with Microsoft Visual Studio
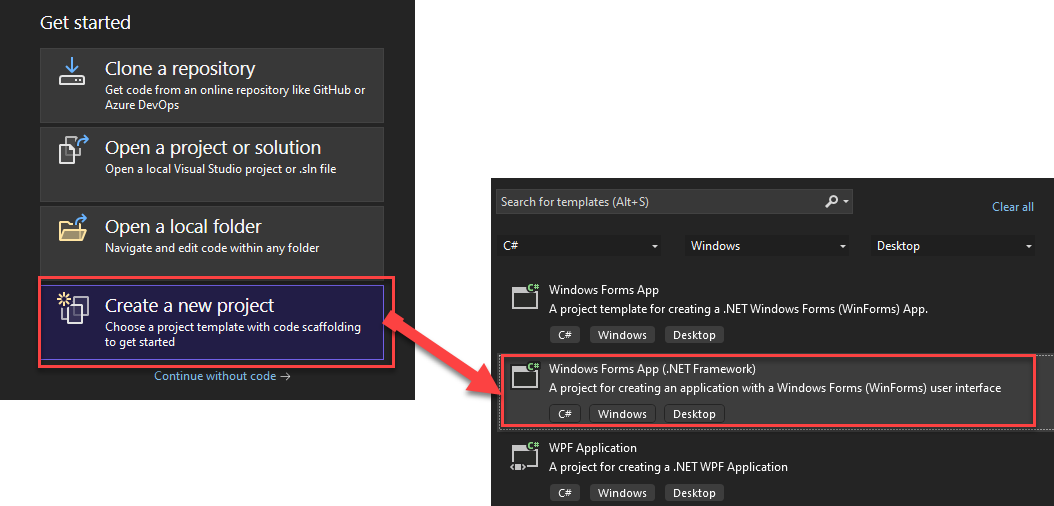
Now, Visual Studio is launched. To create a new project, you need to click on the option Create a new project first. If needed, you can access this command via the menu : File > New > Project...
Then, select the right template to use. We usually use Windows Forms App (.NET Framework), but a WPF application could also be created.

Once the template is selected, click on Next button.
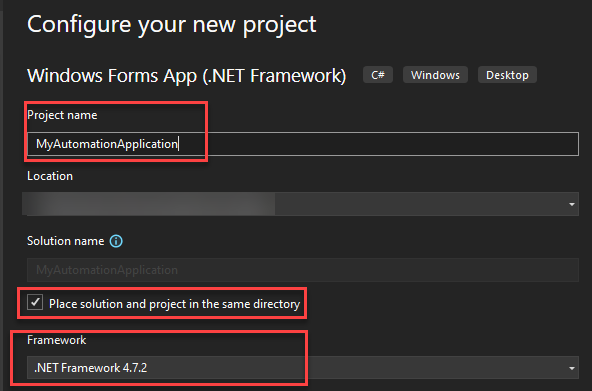
You can now be able to give your project a name and a location. Ensure that the Place solution and project in the same directory option is checked. Then, click on Create button.
